How to Build a Ski Rack
Author

A keen runner, skier and nuts about cycling. Karl lives in Cumbria, where he loves encouraging his two children to follow in his outdoor lifestyle. Whilst out and about keeping active, Karl keeps a diary and shares it with Outdoor Look.
 Rather than chucking your skis and snowboards into a cupboard, it's really best to have a proper storage solution for them as this can give them a longer shelf life. It's best to keep them on a hard, flat surface away from harsh sunlight and humidity. A great solution to this is to build your own ski rack - this'll not only save you the cost of buying a premade rack, but could also save you the cost of replacing your precious skis if they end getting broken due to poor storage. A rack of skis is a luxury, and you should build one right away!
You need:
- Wood glue
- At least four 4-inch lag screws and accommodating washers
- Two 8-foot 2 x 4 boards
- One 8-foot 2 x 6 board
- Two 5-foot metal conduits spanning across a diameter of an inch
- Two 5-foot PVC tubes, an inch long. It will cover the metal conduit
- Around 50 3-inch wood screws
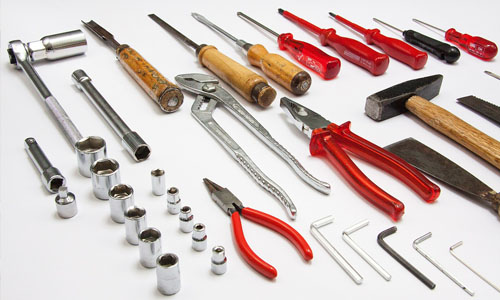
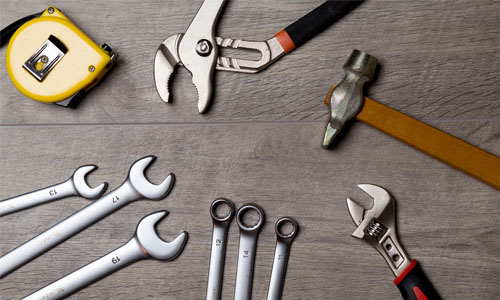
Tools required
- A drill
- Carpenter’s square
- A circular saw, chop saw or handsaw
- Socket wrench or crescent wrench
- Level
- Safety goggles
- Pencil
- A spade bit, which is an inch long
- Pipe cutter
- A mallet
- A stud finder
- A measuring tape
Step 1: Choose a suitable location for keeping your ski rack
You need to find a place that’s spacious enough to accommodate your skis. The height is simply dependent on how many skis are to be placed into it.
Step 2: Some number-crunching needs to be undertaken
Measure and cut both 2x4s 53.5 inches from each end. You’ll get a couple of boards having a length of 53.5 inches. The other two boards would be 42.5 inches long. The planks having a length of 53.5-inches will serve as your front-facing boards.
Step 3: Take the other two boards, measuring 42.5 inches each
 Cut the boards approximately 7 inches away from the ending. You will then receive four 7-inch board length, and two 28.5 inch lengths of board. These will simply be the boards touching the wall.
Step 4: Mark the points
Use a single pencil to mark those points where you plan to use a drill in order to create holes for pegs. Don't do it yet though.
Step 5: Placing the screws
Place the screws. Use one of the 53.5-inch boards. Using wood glue and wood screws, attach one 7-inch-long board. Measure an approximately 6inches of space, and add on a 28.5-inch board length. Measure another 6 of the inches and attach an additional 7-inch board. Then repeat the exercise using the second 53.5-inch board.
Step 6: Drill the peg holes
Drill the peg holes. Use the pencil marks you had made earlier as your guide.
Step 7: Determine the width of your rack
Work out how wide the rack needs to be by measuring the furthest dimensions.
Step 8: Join them together
Position the cut segments of the 2x6 boards in place. Use the wood glue and join those segments with screws.
Step 9: Put the mallet to use
Measure and cut the metal conduits for pegs. With your mallet, pound the pegs into the holes you drilled.
Step 10: Cut the PVC piping
Measure, cut and sleeve, PVC piping. The PVC piping should be cut to the same length as the exposed metal conduits. We made ours 12-inches-long.
Step 11: Your rack is ready
Your rack is complete! Now locate and mark the studs in your wall. It’s important to attach the rack to the studs, not just the wall. Use the socket wrench, washers, and lag screws to attach the rack to the wall. The length of the lag screw will depend on how thick your wall is, use lag screws long enough to go through the wall.
Author
A keen runner, skier and nuts about cycling. Karl lives in Cumbria, where he loves encouraging his two children to follow in his outdoor lifestyle. Whilst out and about keeping active, Karl keeps a diary and shares it with Outdoor Look.
Categories
- Sport (28)
- Product Reviews (3)
- Team Outdoor Look (7)
- Mike Wild (2)
- Mike Payton (2)
- Suse Hammond-Pears (3)
- Snowboarding (12)
- Latest Offers (105)
- Shop Talk (1)
- Competitions (7)
- Walking (413)
- Lifestyle Fashion (8)
- Travel (86)
- Kit Guides (176)
- Workwear Clothing (6)
- Safety Workwear (4)
- Health/Fitness (289)
- Skiing (91)
- Great Outdoors (1316)
- Cycling (92)
- January 2025
- December 2024
- November 2024
- October 2024
- September 2024
- August 2024
- July 2024
- June 2024
- May 2024
- April 2024
- March 2024
- February 2024
- January 2024
- December 2023
- November 2023
- October 2023
- September 2023
- August 2023
- July 2023
- June 2023
- May 2023
- April 2023
- March 2023
- February 2023
- January 2023
- December 2022
- November 2022
- October 2022
- September 2022
- August 2022
- July 2022
- June 2022
- May 2022
- April 2022
- March 2022
- February 2022
- January 2022
- December 2021
- November 2021
- October 2021
- September 2021
- August 2021
- July 2021
- June 2021
- May 2021
- April 2021
- March 2021
- February 2021
- January 2021
- December 2020
- November 2020
- October 2020
- September 2020
- August 2020
- July 2020
- June 2020
- May 2020
- April 2020
- March 2020
- February 2020
- January 2020
- December 2019
- November 2019
- October 2019
- September 2019
- August 2019
- July 2019
- June 2019
- May 2019
- April 2019
- March 2019
- February 2019
- January 2019
- December 2018
- November 2018
- October 2018
- September 2018
- August 2018
- July 2018
- June 2018
- May 2018
- April 2018
- March 2018
- February 2018
- January 2018
- December 2017
- November 2017
- October 2017
- September 2017
- August 2017
- July 2017
- June 2017
- May 2017
- April 2017
- March 2017
- February 2017
- January 2017
- December 2016
- November 2016
- October 2016
- September 2016
- August 2016
- July 2016
- June 2016
- May 2016
- April 2016
- March 2016
- February 2016
- January 2016
- December 2015
- November 2015
- October 2015
- September 2015
- August 2015
- July 2015
- June 2015
- May 2015
- April 2015
- March 2015
- February 2015
- January 2015
- December 2014
- November 2014
- October 2014
- September 2014
- August 2014
- July 2014
- June 2014
- May 2014
- April 2014
- March 2014
- February 2014
- January 2014
- December 2013
- November 2013
- October 2013
- September 2013
- August 2013
- July 2013
- June 2013
- May 2013
- April 2013
- March 2013
- February 2013
- January 2013
- December 2012
- November 2012
- October 2012
- September 2012
- August 2012
- July 2012
- June 2012
- May 2012
- April 2012
- March 2012
- February 2012
- January 2012
- December 2011
- November 2011
- October 2011
- September 2011
- August 2011
- May 2010
- April 2010
- March 2010
- February 2010
- January 2010
- November 2009
- October 2009
- September 2009
Submit a Comment